


What Are Subway Tiles and Why Are They Perfect for Bathrooms?
Subway tiles are rectangular, measuring around 3-4 inches by 6-12 inches, with a length twice the height. Common in kitchens as well as bathrooms, these tiles are known for transforming the vibe of your space and making it feel more classical and seamless. When talking about patterns, the bathroom is a space that can benefit from each and every subway tile layout pattern.
Whether it’s a herringbone tile pattern or running bond, basketweave tiles, or chevron tiles - the bathrooms (especially shower areas) are such notable spaces to use the subway tile. So, let’s have a look at these 5 different ways to use a subway tile in your bathroom!
Today, subway tiles continue to dominate bathroom design trends due to their versatility, durability, and ability to complement both modern and traditional aesthetics. From small bathroom designs to luxury spa-like retreats, subway tiles offer endless possibilities.
Also, Get Inspiration with Subway Tile Pattern Ideas
5 Creative Ways to Use Subway Tile in Your Bathroom
Let's explore five stunning approaches to incorporating subway tiles into your bathroom design that will elevate your space from ordinary to extraordinary.
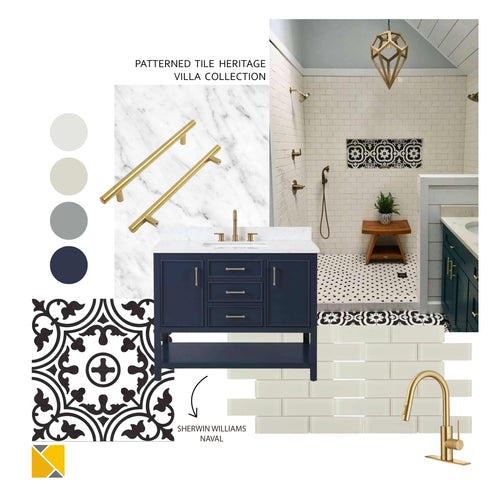
1. Try Subway Tiles All Around the Shower Area

To achieve a modern and sleek look in your bathroom, try using the subway tiles all around the shower area. It will not just segregate the function of that corner but also make it a point of focus and attention. Meanwhile, these subway tiles are easier to maintain and clean - hence, a major plus point in the long run. You can best pair these subway tiles with a fresh coat of paint on the adjacent space!
Why This Works:
- Waterproofing: Subway tiles are naturally water-resistant, making them ideal for wet zones
- Easy Maintenance: Smooth glazed surfaces repel water and prevent mold buildup
- Visual Interest: Creates a designated shower zone that becomes a design focal point
- Durability: Withstands daily moisture exposure better than paint or wallpaper
Best Tile Patterns for Shower Areas:
- Traditional running bond for a classic look
- Vertical stack for modern, contemporary bathrooms
- Herringbone pattern for added visual interest
- Brick pattern for timeless appeal
Pro Tip: Use contrasting grout colors to make the tile pattern pop. White subway tiles with dark grey grout create a striking contemporary look, while matching grout provides a seamless, spa-like aesthetic.
The Subway Tile Patterns: A Classic That Never Goes Out of Style
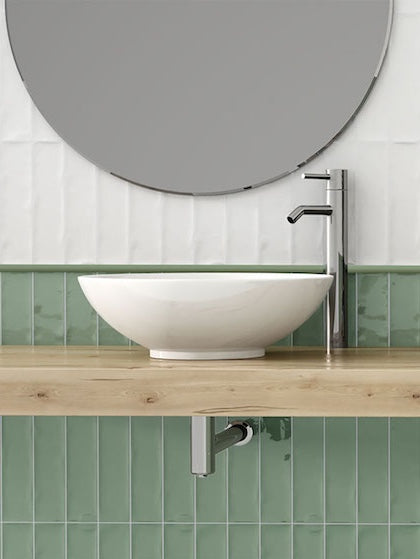
2. Limit the Use of Subway Tiles (Wainscoting Style)

Another intriguing way to use the subway tiles in your bathroom is around the wainscoting. Just limit the stacking of the tiles to only a specific height to create a sense of break and contrast between the upper and lower halves of your bathroom. You can infuse an interesting paint color or wallpaper pattern on the top of this tile layout for a striking and visually appealing look.
Ideal Wainscoting Heights:
- Standard Height: 36-42 inches from the floor
- Three-Quarter Height: 48-54 inches for dramatic effect
- Chair Rail Height: 32-36 inches for traditional styling
Design Combinations That Work:
- Subway tile wainscoting + bold paint color above
- White subway tiles below + patterned wallpaper above
- Colored subway tiles + neutral paint for balance
- Textured subway tiles + smooth painted walls for contrast
Budget Tip: This approach uses fewer tiles, making it a cost-effective option for bathroom renovations while still delivering high-end aesthetic appeal.
5 Alternatives to White Subway Tiles for Kitchen
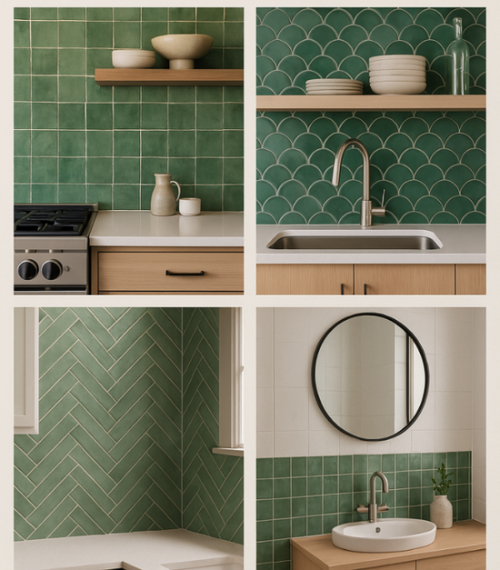
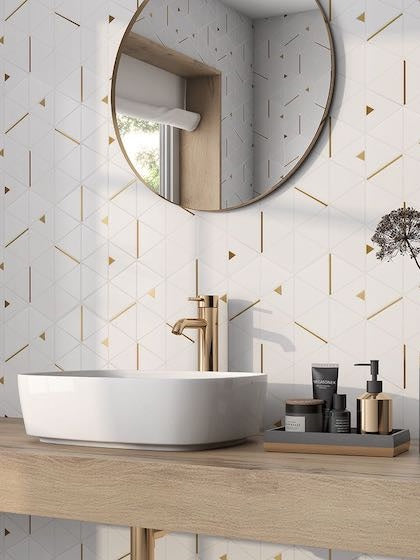
3. Use a Different Color and Pattern

Want your bathroom to stand out? Well, it's time that you try a different color and pattern to make the entire space speak your style and character. The herringbone pattern can be used throughout the dry and wet zones to typically embrace a sense of sophistication and elegance. Meanwhile, depending on the size of your bathroom, choose a color that blends and makes your bathroom feel spacious and airy!
Popular Subway Tile Patterns for Bathrooms:
- Herringbone: Creates dynamic visual movement and sophistication
- Chevron: Modern V-pattern that adds contemporary flair
- Vertical Stack: Makes ceilings appear higher, perfect for small bathrooms
- Basketweave: Intricate pattern that adds texture and depth
- Diagonal: Adds energy and makes narrow bathrooms feel wider
Color Psychology for Bathroom Subway Tiles:
- White/Off-White: Makes small bathrooms feel larger and brighter
- Grey Tones: Sophisticated and versatile, works with any decor
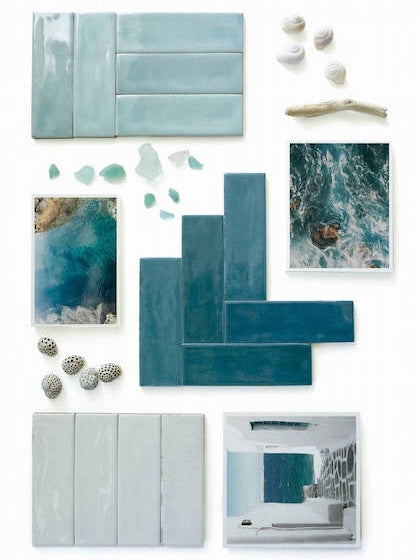
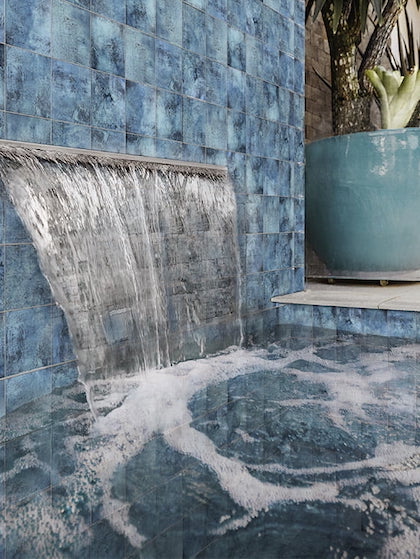
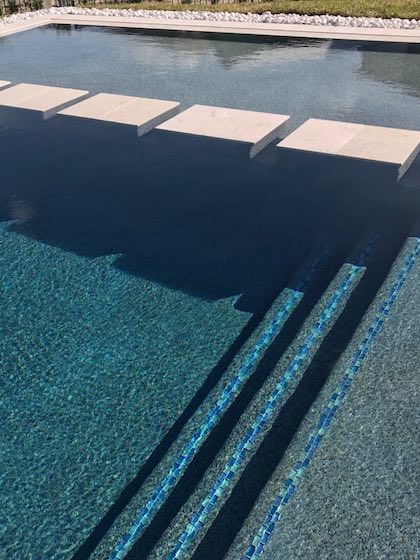
- Blue/Green: Calming, spa-like atmosphere
- Black/Dark Colors: Bold, dramatic statement for larger bathrooms
- Pastel Colors: Soft, vintage-inspired aesthetic
Design Trick: Use lighter colored subway tiles for small bathrooms to create an illusion of more space, and reserve darker colors for larger bathrooms where they won't feel overwhelming.
Must Read 5 Ways To Lay 1 Herringbone Tile Pattern
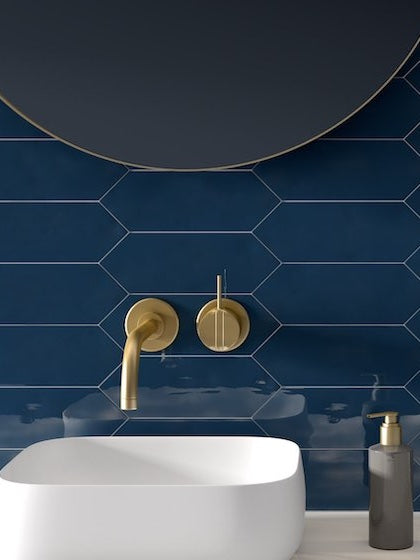
4. Play Bold and Dramatic

Subway tiles aren't subtle and sober all the time! You can equally create a bold and dramatic look with a dashing pair of dark tiles stacked up to the height of the ceiling. You can either choose to run this tile all around the bathroom or just pick the shower area to stand out and play a focal point. You must also note the various finishes of these subway tiles - glossy, matte, semi-gloss, and metal.
Subway Tile Finishes Explained:
Glossy Finish
- Reflects light beautifully
- Makes small bathrooms feel brighter
- Easy to clean, but shows water spots
- Best for: Modern, contemporary bathrooms
Matte Finish
- Sophisticated, understated elegance
- Hides water spots and fingerprints
- Provides better slip resistance for floors
- Best for: Minimalist, Scandinavian designs
Semi-Gloss Finish
- Balance between glossy and matte
- Subtle sheen without too much shine
- Versatile for various design styles
- Best for: Transitional bathrooms
Metal/Metallic Finish
- Adds luxury and glamour
- Reflects light uniquely
- Creates an industrial-chic aesthetic
- Best for: Statement accent walls
Creating Drama with Dark Subway Tiles:
- Full Coverage: Floor-to-ceiling dark tiles create an enveloping, luxurious space
- Accent Wall: One dark tile wall with lighter surrounding walls for balance
- Two-Tone Design: Dark subway tiles on the lower half, light on the upper half
- Shower Feature: Dark tiles in the shower only, creating a dramatic focal point
Lighting Consideration: Dark tiles require excellent lighting. Install bright LED fixtures, add recessed lighting, or incorporate a large window to prevent the space from feeling cave-like.
Check out the blog on The Popular Antique Tile Collection
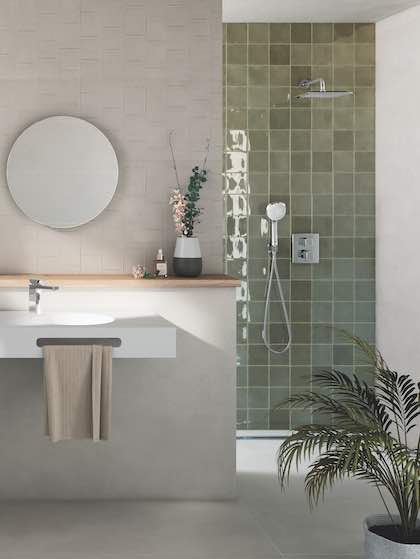
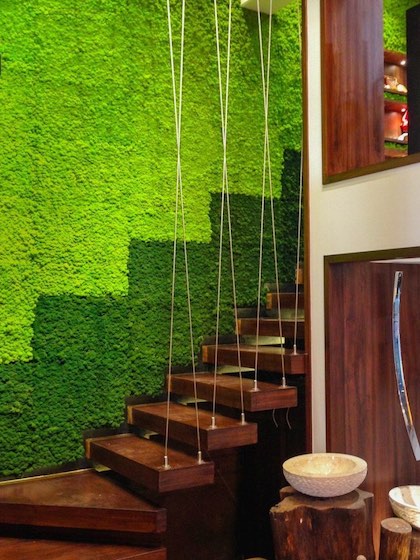
5. Use Different Types of Tiles (Mixed Patterns)

Who says that you have to be limited to just one type of tile? Yes, you can absolutely create a contrast and add depth with two different types of tile patterns. In this image, the horizontal running bond plays flawlessly with stacked vertical heights! It divides focus and adds more depth and character to the space.
Creative Pattern Mixing Ideas:
Horizontal + Vertical Combination
- Lower wall: Horizontal running bond
- Upper wall: Vertical stack pattern
- Creates visual division without different colors
- Modern, architectural aesthetic
Different Sizes Mixed
- 3x6 inch subway tiles with 4x12 inch larger format
- Creates rhythm and visual interest
- Works well in large bathrooms
Color Blocking with Patterns
- Same tiles, different colors in different patterns
- Defines functional zones (shower vs vanity area)
- Adds personality without overwhelming
Accent Strip Integration
- Standard subway tile pattern with decorative strip at mid-height
- Adds luxury without a full accent wall commitment
- Easy way to incorporate metallic or colored tiles
Choosing the Right Subway Tile for Your Bathroom
Tile Size Matters
3x6 Inches (Standard)
- Most traditional and widely available
- Works in any bathroom size
- Easiest for DIY installation
- Most cost-effective option
4x8 Inches
- Slightly larger, contemporary feel
- Reduces grout lines (easier maintenance)
- Good for medium to large bathrooms
4x12 Inches
- Modern, elongated appearance
- Makes walls appear longer
- Best for larger bathrooms or feature walls
2x4 Inches (Mini Subway)
- Vintage, charming aesthetic
- Perfect for small bathrooms or accent areas
- More intricate, time-consuming installation
Material Options
Ceramic Subway Tiles
- Most affordable option
- Wide variety of colors and finishes
- Good for walls, not recommended for floors
- Ideal for: Budget-conscious renovations
Porcelain Subway Tiles
- More durable than ceramic
- Water-resistant, suitable for floors and walls
- Slightly more expensive but longer-lasting
- Ideal for: High-traffic bathrooms, shower floors
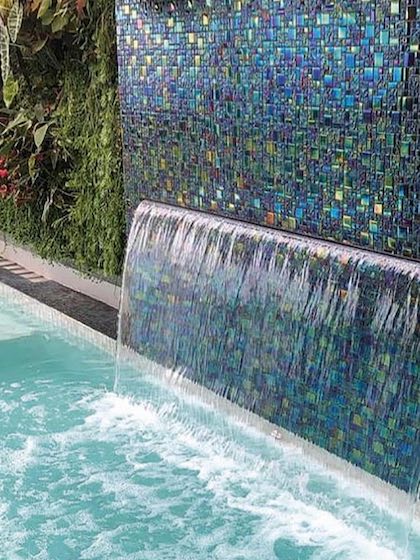
Glass Subway Tiles
- Luminous, light-reflective properties
- Creates spa-like atmosphere
- More expensive, requires professional installation
- Ideal for: Luxury bathrooms, accent walls
Natural Stone Subway Tiles
- Marble, limestone, or travertine options
- Unique, high-end aesthetic
- Requires sealing and more maintenance
- Ideal for: Luxury master bathrooms
Metal Subway Tiles
- Stainless steel or copper options
- Industrial-chic or glamorous look
- Durable but can show water spots
- Ideal for: Modern, industrial bathrooms
Installation Tips for Bathroom Subway Tiles
DIY vs. Professional Installation
DIY Installation (Beginner-Friendly)
- Simple running bond pattern
- Small area (under 50 sq ft)
- Straight walls with no complex cuts
- Estimated time: 2-3 days for small bathroom
Professional Installation Recommended
- Complex patterns (herringbone, chevron)
- Large bathrooms (over 100 sq ft)
- Shower pan and waterproofing needs
- Uneven walls requiring extensive prep
Step-by-Step Installation Overview
Surface Preparation
- Remove old tiles or ensure wall is clean and flat
- Install cement board in wet areas
- Apply waterproof membrane in shower zones
Layout Planning
- Find center point of wall
- Dry-lay tiles to plan cuts
- Mark horizontal and vertical guidelines
Tile Application
- Use appropriate thin-set mortar
- Apply mortar with notched trowel
- Press tiles firmly with slight twisting motion
- Use tile spacers for consistent grout lines
Grouting
- Wait 24-48 hours before grouting
- Apply grout with rubber float at 45° angle
- Remove excess grout with damp sponge
- Seal grout after 72 hours (for porous grout)
Conclusion: Transform Your Bathroom with Subway Tiles
Well, there are endless ways to style that subway tile in your bathroom. You can play with textures, patterns, colors, zones, and even styles! From creating a bold, dramatic statement with dark tiles to achieving a serene spa-like retreat with classic white subway tiles, the possibilities are truly limitless.