


Before Installing
These instructions are meant to be a general guide for installations under normal conditions. Please read and understand this information before installation. If you have no experience with the installation of glass tile products obtain professional advice or use their services for the installation.
These glass mosaic tiles are made of transparent glass face-mounted with a clear poly film. These products are made using a handmade cast process. A certain amount of variation in color, shade, texture, size and tone is a desired feature and is inherent to this production process.Some bubbles, veins, wrinkles and other small irregularities in many of the pieces is typical, consistent and intended with this production process.
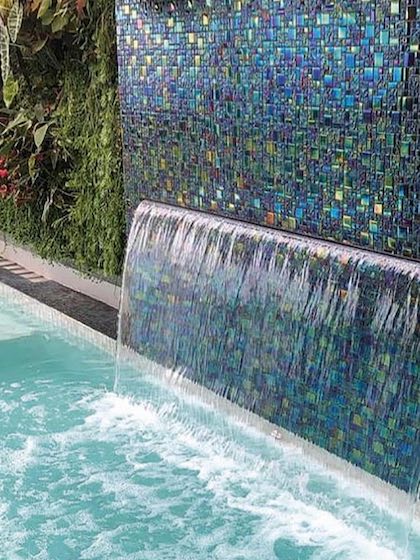
These transparent iridescent glass tiles can be used for interior and exterior wall applications in wet or dry locations. Correctly installed, these glass mosaics can be used in pools, underwater and or in continuously wet areas, such as water-fountains. All submerged, underwater installations must be done by experts, which may require specific installation procedures and setting materials.
Recommended Substrate
Cement backer units and or concrete masonry block are acceptable substrates. Gypsum wallboard can be used for interior walls only. Do not install these products with membranes between the glass and the setting substrate! When it is installed close to hot areas (i.e. cook-tops, fireplaces and similar applications), keep the glass at a minimum safe distance of at least 6" from any source of heat or heated surface.
Planning is needed for the use of any glass tile products when the surface will be subject to wide temperature changes within short time frames. Example: outside areas where a hot summer day can suddenly be hit by a rain shower, may cause thin glass mosaic to cool down immediately shrinking faster quickly than the thick concrete backing. This will cause the glass mosaic to either crack or detach.
Installation
Verify product characteristics BEFORE installation for any visible defect and or other aspects of the product that may be questionable, such as, but not limited to: shade variation, chipped edges, and scratched surfaces. Also check for variations between ordered and supplied products.
Installation, where a claim to be defective is not caught or the material is not corresponding to customer's expectations, constitutes acceptance of the product as is" and no claims will be accepted after installation.
Never use products from different lots. Every box is labeled showing to production lot #'s, never mix these as part of the same installation.
The installation of transparent iridescent glass tile requires proper surface preparation, a careful installation using a quality thinset and grout. Glass tile may expand, so expansion joints are very critical for interior or exterior. Pools and other submerged areas with these tiles require exterior expansion joints no more than every 8 – 12 feet, perimeters, at waterline and dissimilar materials like the deck to pool coping. Movement (Expansion) joints should be provided to comply with TCA method EJ 171.
Surface Preparation
All surfaces must be between 40ºF (4ºC) to 95ºF (35ºC) and structurally sound, dry, clean, free of paint, old adhesives, sealers and curing compounds. Any contaminates that inhibit proper bond must be removed. Substrate preparation should be completed following ANSI A108 AN-2 “General Requirements for Sub-surfaces”. All substrates should be plumb and true; surface deviation should not exceed ¼” in 10’. Patching, leveling and prepare a substrate should be using Mer-Krete’s Underlayments. Mineral Tiles recommends Merkrete’s HydroGuard SP1 waterproof and crack isolation membrane for most substrates.
Applying Thinset Mortar
Apply a quality latex-modified thinset approved for use with glass or vitreous tile. Apply the mortar to the substrate with the flat side of the trowel, with enough pressure to firmly work into the surface. With a notched trowel, immediately follow with a heavier coat of material using the appropriate trowel and enough mortar to provide the necessary coverage to the back of the tile. Do not spread more mortar than can be covered in 20 minutes or before the mortar skins over. It is advised that during the installation, to remove a tile to ensure the mortar has not skinned over and check the tile and substrate mortar coverage.
Coverage of the thinset mortar is critical to the success of the installation of the tile. In submerged installations, the coverage of thinset between the substrate and tile should be a minimum of 95%. Coverage is also important, or you may see moisture between the glass tile and the substrate. Comb the mortar using an appropriate notched trowel in one direction, using the back of the trowel; flatten any notches of the mortar previous to placing the mosaic glass tile. Place tiles in mortar; beat in, to ensure proper coverage. Do not adjust tiles set in mortar after 15 minutes.
Ceramic Tile Mastic should never be used for the installation of glass tile, because it may change the color of the glass, and they may come off the wall over time.
Back Butter
Spread a thin layer of thinset on the back of the glass mosaic tile sheet with the flat edge of your trowel. This back-buttering step is best used for all glass mosaic tile but is essential when using fully transparent tile, in order to keep any remaining trowel lines on the substrate from showing through. Back-buttering also ensures near-complete (95%) surface adhesion between tile and substrate.
During back-buttering, it is not uncommon for thinset to push through the mesh. This process may partially fill the grout joints and rise above the surface of the tile once the sheet is applied to the wall. This process is normal and the reason professional installers often prefer Merkrete’s Integra mortar/grout or using the same installation material as both mortar and grout. If you choose not to set in color, use a premium thinset like Merkrete’s 735 PremiumFlex white.
Setting
Set your sheets into the thinset layer spread on your substrate, taking care to square the sheets as you go. Sheets should be placed onto the newly troweled thinset on your surface immediately. DO NOT delay this step, or your thinset will begin to dry, and the tiles will not fully adhere to the surface. The thin-set mortar MUST cover the back of each glass piece pushing up slightly into the joints. Air bubbles not pushed out will be visible through the transparent glass and the bonding capacity of the mortar will be reduced. You can remove excess thinset from the joints, before grouting later.
Leveling
Square the sheet and apply to your surface, and then "beat in"; gently with a rubber float or a beating block and a hammer to ensure 100% adhesion and a level surface. Beating in with your float or beating block across the joint between adjacent sheets will achieve a level field across the entire area. Properly beating in, and leveling will also prevent air bubbles from being trapped between the thinset and tile.
Align Grout Joints
Align each sheet carefully as it is installed to create uniform grout joints from sheet to sheet. A joint between adjacent sheets should measure the same distance as the joint between the rows of tile within a single sheet. If the joint between the sheets is wider, you will see a series of individual sheets outline on your surface, instead of a smooth, continuous field of tiles that covers the entire area.
Within 15-20 minutes of applying each section of your area, examine and straighten any joints that are not aligned. These straightening and aligning steps MUST be done while the thinset is still pliable. Do not wait until all of the sheets are installed to begin straightening the joints or the thin-set will be too dry to allow any realigning. Repeat these installation steps until all sheets have been installed. If you want to adjust the positioning of one or more glass pieces, use a sharp cutter to cut the clear film around the piece(s) in order to move as desired. Adjustments must be done immediately after or during the installation process before the setting material has dried.
Grout Preparation
After 24-48 hours (dependent on climate and relative humidity), the thinset will be cured, and the tiles will be ready for grouting.
Use a nylon bristle brush, a sponge, and warm water to clean any glue or paper residue from the tile surface.
Grout Application
Installation shall conform to the current method of ANSI A108.10.
Hold a rubber grout float at a 45° angle, force grout diagonally into joints ensuring joints are filled. Remove excess grout using edge of the float held at a 90° angle. Cleanup can begin as soon as the grout becomes firm enough only to be slightly indented when pushed. Do not use too much water for grout cleanup. Excess water will cause variation in color and may cause shrinkage, cracks or pinholes. Smooth and level joints in a circular motion, remove excess grout from tile with a damp small pore grout sponge. It is best to change cleaning water and rinse sponge frequently. Using clean water and sponge will enhance color uniformity.
Remove or buff grout haze from the tile surface with a soft, dry cloth.
Do not use excessive force if using sanded grout, as it may scratch the glass.
Iridescent glass tiles submerged or areas that may not dry out, it is recommended that the latex modified mortars and grout in the installation be allowed to dry out thoroughly before exposure to water. A submerged installation of the transparent iridescent glass tile will require a minimum of 14 to 21 days from completion of the installation before the area can be filled with water. The curing time may be extended due to humidity, temperature and other climatic conditions and whether the installation is interior or exterior.
When shopping for tiles online, make sure to look at the specifications of the tile.