

Key Points
- Tile Drenching is the practice of wrapping floors, walls, and sometimes ceilings in the same or tonally matched tile to create a seamless, immersive environment.
- Driven by large-format and gauged porcelain panels, Tile Drenching is a key tile trend for 2025 that delivers cohesive aesthetics, durability, and high visual impact in wet zones.
- In practice, Tile Drenching transforms bathrooms and kitchens via floor-to-ceiling applications, extended backsplashes, and wrapped cabinet returns that unify form and function.
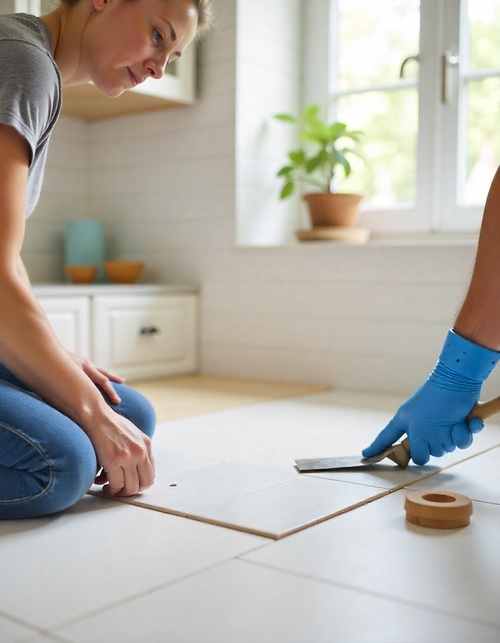
- Successful implementation requires floor-and-wall-rated tiles, matched grout, professional waterproofing, strategic lighting, and proactive maintenance planning.
What Is Tile Drenching?
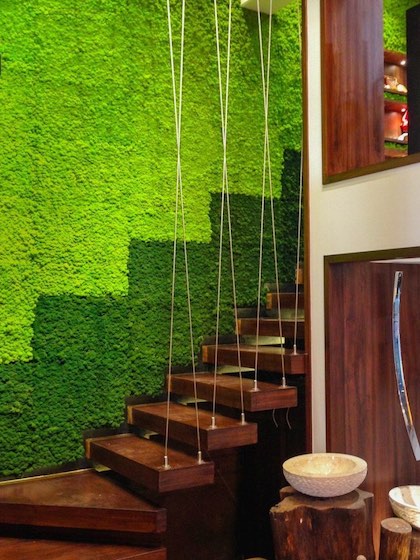
Tile Drenching is the design strategy of extending tile surfaces beyond traditional limits—wrapping walls, floors, and often ceilings in the same or closely related tile material. In bathrooms, that might mean the shower, vanity wall, and floor all use the same tile. In kitchens, backsplash, side walls, and sometimes cabinet returns may be drenched in tile.
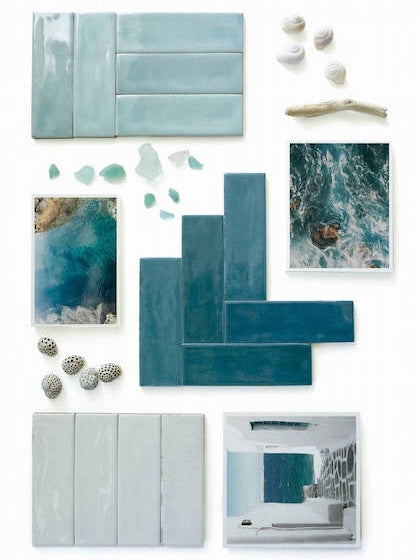
This method echoes the “color drenching” concept (applying one hue across surfaces) but is tile-driven instead of paint-based. Mineral or stone tones are common in this approach, hence “mineral drenching” as a variant — We cover this in Color Drenching with Tiles, where they explore stone-look porcelain and earthy palettes.
Key attributes:
- Visual continuity with minimal breaks
- Seamless or low-grout lines
- Use of large-format or gauged tiles
- Harmonious tones, textures, or finishes
Why Tile Drenching Is a 2025 Trend

1. Unified Aesthetics & Spatial Flow
By eliminating visual breaks between surfaces, spaces feel more intentional and sculptural. A bathroom drenched in one tile feels calm, cohesive, and elegant — much like the designs featured in Modern vs Classic Bathroom Floor Tile Ideas, where large-format tiles and seamless finishes dominate.
2. Simplified Material Choices
When you commit to one tile (or a palette of tonal matches), you reduce decision fatigue—every choice coordinates by default.
3. Durability & Practicality
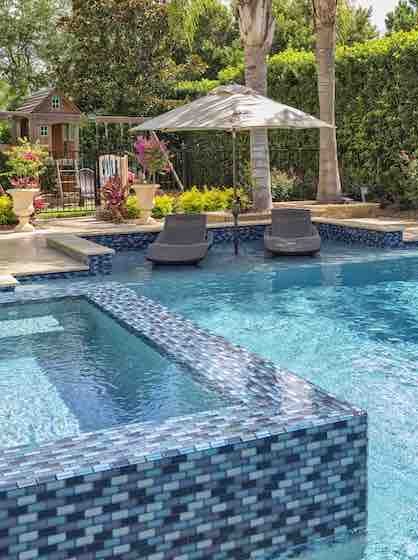
Tile is inherently water-resistant, easy to clean, and durable in wet zones. Extending tile across more surfaces increases longevity and hygiene in bathrooms and kitchens.
4. Luxury & Visual Impact
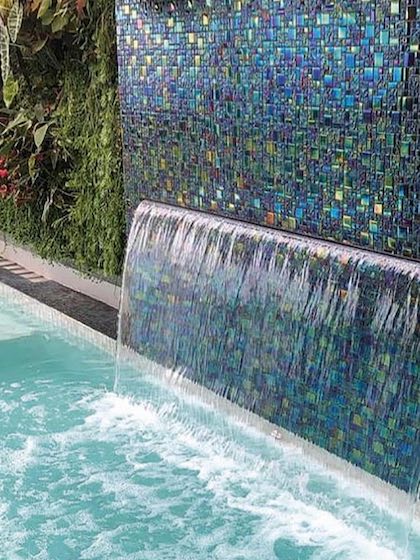
Tile drenching is dramatic. Wrapped surfaces feel high-end, especially when using stone-look, marble-veined, or texture-rich tile.
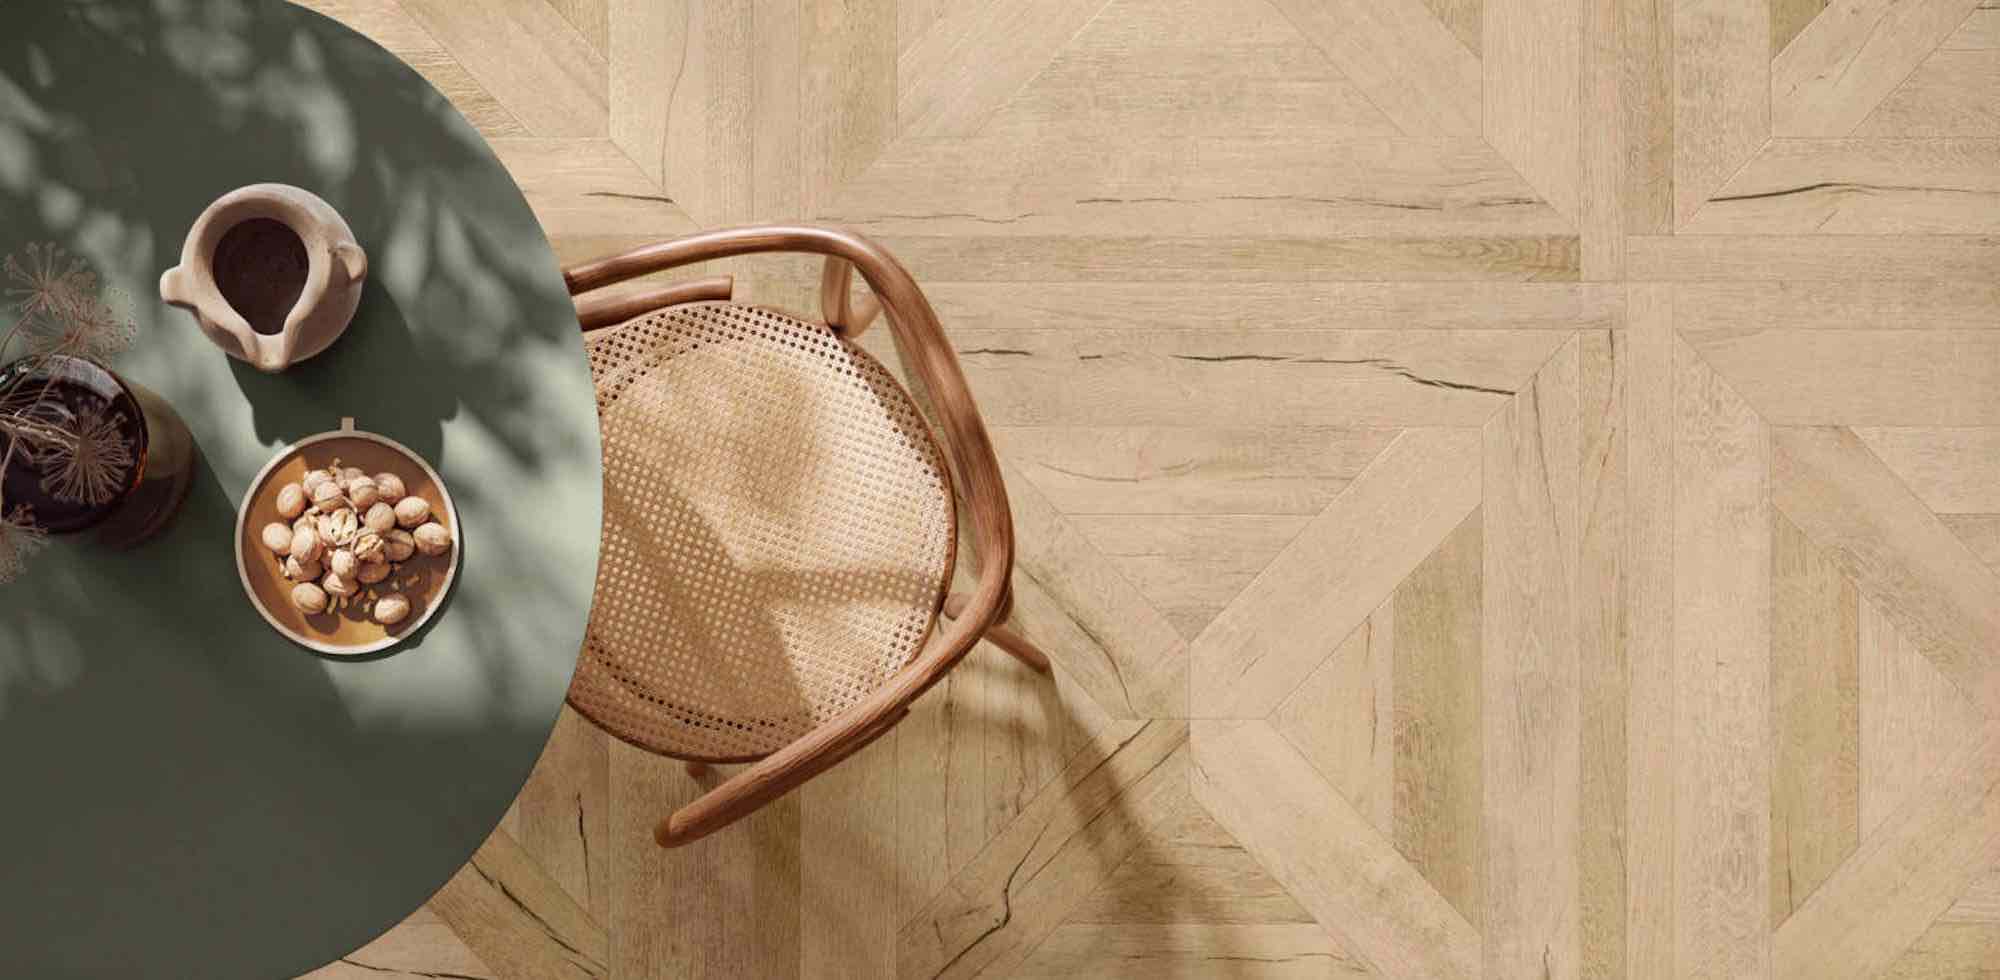
5. Large Formats / Gauged Panels Enable It
The rise of large-format tiles and gauged porcelain panels helps reduce grout lines and allows seamless application.
Applying Tile Drenching in Bathrooms & Kitchens
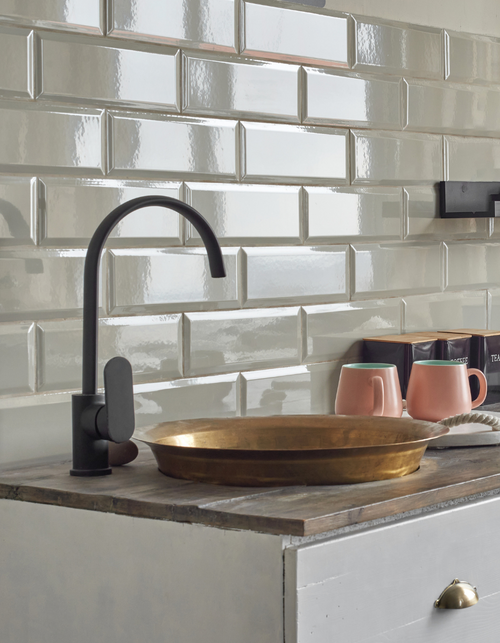
A. Tile Drenching in Bathrooms (tile drenching bathroom)
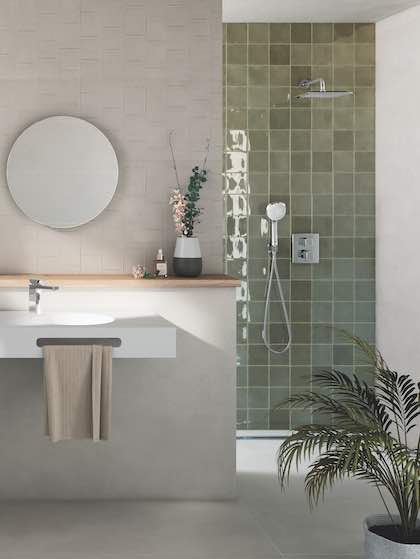
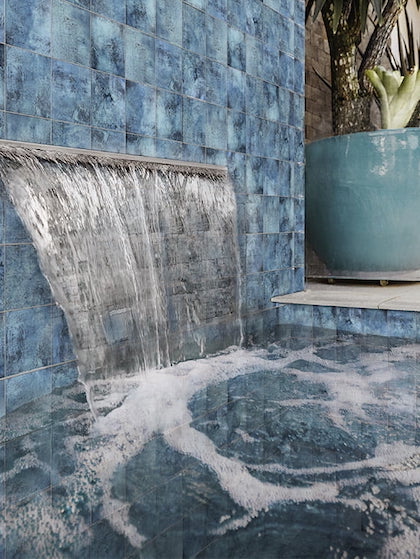
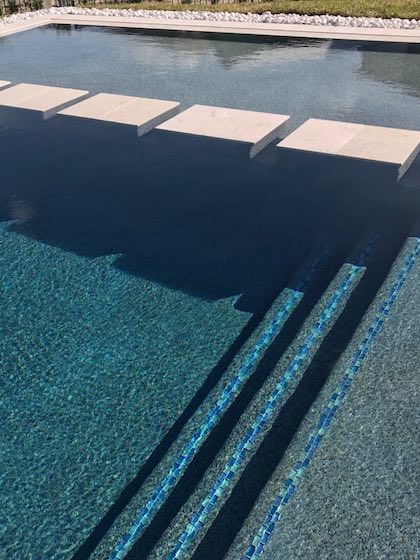
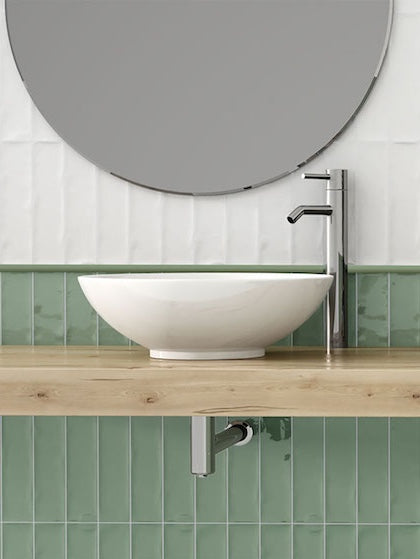
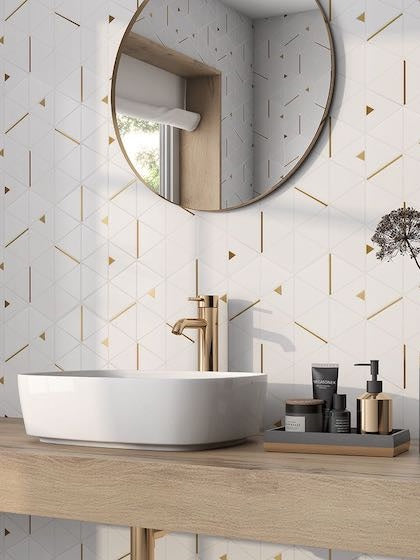
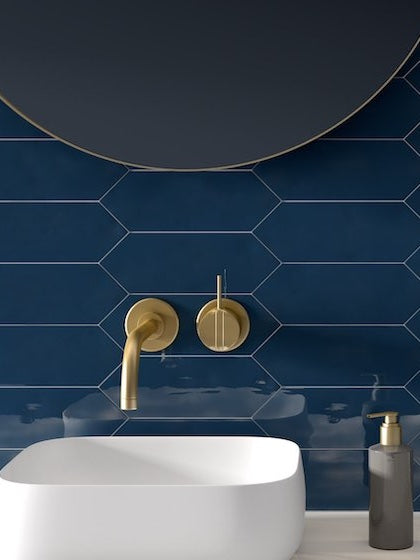
- Floor-to-ceiling application: Use the same tile from floor to ceiling for a spa-like continuity.
- Shower and wet zones: The shower niche, back wall, and even ceiling above the shower can carry the same tile.
- Match grout color: Choosing grout that closely matches the tile makes the drenching more seamless; a contrasting grout can emphasize geometry.
- Texture variation: Use different finishes (matte vs gloss, textured vs smooth) in zones to add depth without breaking the unified look — much like some of the Stylish Metal Tile Ideas for Kitchens & Bathrooms guides, where metal mosaic or glossy finishes are used to highlight transitions or accent zones.
- Lighting & accent strips: Hidden LED strips or niche accent lighting highlight tile texture and prevent flatness.
- Ventilation & moisture control: With more tile surfaces, moisture behavior matters — ensure waterproofing, drainage, and proper sealing.
See how porcelain tiles redefine bathroom luxury
B. Tile Drenching in Kitchens (tile drenching kitchen)
- Extended backsplash: Instead of stopping at a cabinet height, push the tile up to the ceiling or wrap it around corners — see creative installations in Trendy Porcelain Kitchen Floor Tiles Ideas, which show how porcelain floor tiles coordinate beautifully with bold backsplashes and vertical surfaces.
- Cabinet returns & side walls: Use the same tile on side panels or cabinet returns for visual continuity.
- Floor-to-wall flow: If possible, carry the same tile from the kitchen floor into the adjacent backsplash or wall zones.
- Focal wall or full wall drenching: Highlight one wall (behind the stove, sink, or open shelves) drenched in tile for maximal impact.
- Transition zones: Use subtle transitions (e.g., tile change at cabinet kick, but same material family) so drenching feels intentional.
Browse our trending kitchen tile ideas for 2025
Design Tips & Best Practices

1. Choose Tiles Rated for Floor & Wall Use
To avoid surprises, use tiles that are appropriate for both vertical and horizontal surfaces. They must resist wear, slip, and moisture.
2. Opt for Large Format / Gauged Panels
These reduce grout lines and create uninterrupted surfaces — essential for high-impact drenching.
3. Use a Monochromatic or Tonal Palette
Even when using different textures, keeping color within a narrow range reinforces cohesion.
4. Vary Texture or Finish Subtly
Glossy and matte finishes, or slight texture shifts, can preserve interest without breaking the flow.
5. Grout Strategy is Crucial
- Matching grout: seamless effect
- Contrasting grout: highlight geometry
- Very fine grout lines minimize visual clutter
6. Anticipate Maintenance & Repair
Tiles covering more surfaces means more area to maintain or repair. Use high-quality sealants, plan for replacement access, and choose durable tile.
7. Proportion & Scale
Large rooms tolerate bolder patterns, while small bathrooms demand narrower proportions and subtler textures.
8. Lighting & Shadows as Design Tools
Surface light (grazing, wall wash) can emphasize texture or variation even in a “uniform” tile drench.
Final Thoughts
Tile Drenching is more than a fleeting aesthetic—it’s a way to reimagine the role of tile in space design. When done well, it transforms bathrooms and kitchens from segmented rooms into continuous, immersive environments. As tile trends 2025 evolve, immersive drenching is among the top movements pushing boundaries in residential interiors.
For those curious to adopt it: test with sample tiles, visualize drenching in your space (use mockups or VR tools), and consult with installers early to plan logistics (cuts, transitions, waterproofing).
Ready to Drench Your Space?
Get expert tile advice and free design inspiration from MineralTiles.
Visit TileTalk Blog